Raspberry Pi
Here's my random notes on dealing with the Raspberry Pi.
Installation (via OS X)
Download Raspbian from here, unzip it, and then insert the SD
card. OS X may mount it, at which point you need to unmount and find the
disk number via diskutil:
→  diskutil list
/dev/disk0 (internal, physical):
   #:                       TYPE NAME                    SIZE
IDENTIFIER
   0:      GUID_partition_scheme                        *500.3 GB   disk0
   1:                        EFI EFI                     209.7 MB   disk0s1
   2:          Apple_CoreStorage Macintosh HD            499.4 GB   disk0s2
   3:                 Apple_Boot Recovery HD             650.0 MB   disk0s3

/dev/disk1 (internal, virtual):
   #:                       TYPE NAME                    SIZE
IDENTIFIER
   0:                            Macintosh HD           +499.1 GB   disk1
                                 Logical Volume on disk0s2
                                 CCEA91BE-3F95-490C-87FE-96C1CAFB5F9B
                                 Unencrypted

/dev/disk2 (internal, physical):
   #:                       TYPE NAME                    SIZE
IDENTIFIER
   0:     FDisk_partition_scheme                        *8.0 GB     disk2
   1:             Windows_FAT_32 boot                    66.1 MB    disk2s1
   2:                      Linux                         7.9 GB     disk2s2
I can tell, based on the size of the disk (8GB) and the presence of the
FAT32 boot partition that this is my SD card, so time to unmount and dd
the raspbian image on.
→  diskutil unmountDisk /dev/disk2
Unmount of all volumes on disk2 was successful

→  dd if=$RASPBIAN_IMAGE of=/dev/rdisk2 bs=1M
...
(Note the r in /dev/rdisk2, it's important)
Enabling SSH
Normally, the Raspberry Pi won't listen on TCP/22 without manual re-configuration. This is probably because it ships with a default account, with known, fixed credentials and superuser access.
If you understand the ramifications, you can totes fix this by dropping an
empty file named ssh in the root of that FAT32 boot partition. The
startup sequence will notice the file and turn on SSH for you. Just make
sure you take the appropriate steps to secure the Pi afterwards...
This is actually documented in the Official Raspberry Pi Docs, under section 3 "Enable SSH on a Headless Raspberry Pi".
Powering the Pi
All you need is a USB Micro-B cable and a source that can push 5V / 1A. Normally, this means plugging it into a powered port on a laptop or server, but any wall charger that pumps out 5V / 1A (no more, no less) will do. For example, the Apple wall-to-USB-A adapter I use to charge my iPhone works — if you look real close, in good lighting, you will see the power output printed between the wall prongs.
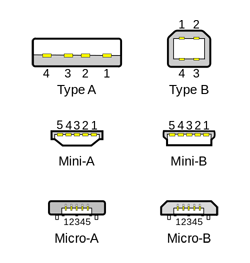
Also, worth noting, the data pins on the Micro-B female socket are not wired to anything, so you cannot transfer data. No USB Serial UART or anything hiding out board-side. Here's the Pi PCB Schematic, see for yourself!