A Few Notes On Configuring Ergo Dox Keyboards
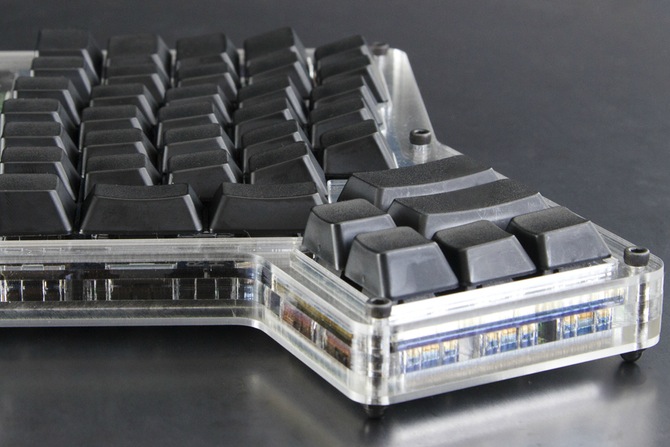
Back in January, I joined Massdrop, bought an Infinity Ergo Dox split keyboard, and got hooked on all things mechanical keyboards.

I used the default layout for a few days before I started experimenting with custom layouts. What follow are the notes I'm leaving for myself. If you have stumbled across this page and find it useful, great! If not, there is a vibrant (and helpful!) community of keyboard enthusiasts on Reddit, Geekhack and Deskthority.
Which Layout Configurator?
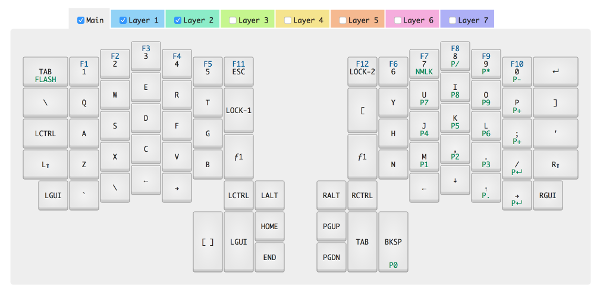
As far as I can see, there's two: one from Massdrop and another from Input Club. They both seem to do a decent job of letting you graphically configure your keyboard layout, and I've never had issues using the firmware generated by either.

I personally prefer I:C's configurator, because it shows you a single layout graphic, with all of the layers super-imposed (see above), rather than repeating the diagram once per layer.
Locking and Latching
The Ergo Dox derives much of its power and flexibility through layering. Why have just one set of key mappings when we have a programmable microcontroller? Layers give us lots (up to 8!) virtual keyboard mappings (buttons → keycodes), activated through firmware-intercepted keypress events.
Layers can be stacked, and keypresses "fall-through" to lower layers until
they hit a mapping configuration. This makes it trivial to overlay your
main layout with a partial layout. For instance, you can set up a layer
with just the FN keys in place of the top-row number keys, and your QWERTY
keys act like normal.
Neat. So how do you activate a layer? Via one of these:
- ƒ[num]
- LOCK-[num]
- LATCH-[num]
- (NEXT|PREV)-ƒ
Hrm. That's a lot of options, each with its own peculiar behavior.
ƒ[num] is a temporary modifier, like Ctrl, Alt or Shift. You hold
it down, and the keyboard activates that layer for as long as you keep
holding it down. If you wanted to have a "math symbols" layer, but never
really needed to type a string of symbols in a row, you can use ƒ[num]
LOCK-[num] is the CapsLock to ƒ[num]'s Shift: it toggles the
activation of the given layer on or off. Lots of people use LOCK-[num] to
switch to a superimposed numpad (tenkey) or even to flip QWERTY →
COLEMAK or QWERTY → DVORAK.
LATCH-[num] doesn't really have an analog on other keyboards. It sits in
the middle-ground between ƒ[num]'s temporary activation and LOCK-[num]'s
toggling behavior — it activates the layer until a keypress is seen.
The mapping will be consulted with the configured layer active, and then
that layer will be deactivated. You can think of it as a sort of
disconnected ƒ[num], where you don't have to hold down the activator key
to use the layer.
NEXT-ƒ (and its sister PREV-ƒ) cycle the active layer through the
available layers. I'm still a bit fuzzy on this one, as I haven't had the
time to truly play with it. I've taken to assigning these to the
bottom- and outer-most keys on either side (usually set to LGUI and
RGUI) and it's nice. If you've got mappings defined on a layer, NEXT-ƒ
and PREV-ƒ happily cycle through the layers (1-2-3-etc.) and the LCD HUD
changes color and displays the layer number.
You NEED That FLASH Key
Seriously. Without the FLASH key (preferably on both halves), you have to
resort to disassembling the case to access the Teensy flash pushbutton on
the bottom of the PCB. That's a serious PITA, so just configure a FLASH
on each side, k? You can put it in its own layer if you're worried about
key real estate...
The actual process of flashing the firmware is pretty straightforward:
$ brew install dfu-util
--- <press the FLASH button> ---
$ dfu-util -D /path/to/firmware.bin
You're supposed to plug each half in directly and flash; the I:C configurator should provide both left- and right-hand side firmware images.
Sending Unicode (Greek, Mostly)
I'd love to be able to do this. I probably have to dig deeper into the firmware world, and stop relying on the configurators so much.
