X.509 is everywhere. You may not realize it, but these words were sent to your screen under the privacy of X.509 PKI, as part of the TLS protocol that puts that pretty little green lock up in the URL bar.
When I first encountered X.509 Certificates, they were big, scary, expensive things that only e-commerce sites, bank, and paranoid people wanted. They were so expensive, and so complicated, in fact, that architectures often centralized their usage, so you may have x.jameshunt.us, y.jameshunt.us, and z.jameshunt.us for the regular traffic, but the secure traffic was forced through secure.jameshunt.us (because that's what you paid to get in the certificate!)
Nowadays, with things like Let's Encrypt, you can pretty much get a certificate for free, with only minimal effort expended to prove you are who the certificate says you are.
But this isn't a post about Let's Encrypt.
This is a post about how to handle all those pesky systems that don't natively implement ACME. Systems that need / want X.509 certificates, but expect you to do all the legwork in getting one.
Systems like SHIELD, Cloud Foundry, and Vault (to name a few).
Here's the thing: generating X.509 certificates is hard. Google around for a bit and you'll find a hundred different ways to invoke openssl, different ways of setting up a transient CA directory, and different ways of generating the signing key (some of which even use 1024-bits ferchrissakes!) Most of the time, these processes pop out a self-signed certificate that's good for a year. If you're lucky, the certificate has Subject Alt Names (SANs).
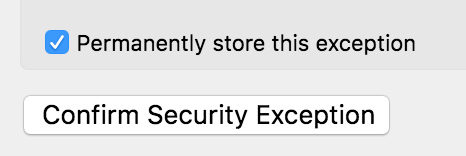
Judicious use of self-signed certificates leads to "browser exception fatigue" (a real medical malady, I assure you). Try as you might to only temporarily set an exception just for this one session each and every time, one day you're going to forget and not uncheck the bad little checkbox.
Ideally, you run your own Certificate Authority.
Yeah, you heard me. You can run your own Certificate Authority. It's not that hard, and if you bear with me here, I'll show you exactly what to do to keep it as safe and secure as I know how.
On Matters of Authority
Contrary to what you may have heard, you can run your own Certificate Authority. When you get right down to it, a CA is nothing but a key and a promise. The key is used to sign certificates that vouch for identities, and the promise is "I will vet the people and systems I sign certificates for."
The one thing you won't easily be able to do is get your CA certificate loaded into every browser and operating system in marginal use today. That's where Verisign, GeoTrust, DigiCert, Thawte, GoDaddy, Network Solutions, et al have you beat -- they are already trusted by the browsers and the OS you're using.
But the difference between logging security exceptions for self-signed certificates (that you generate) and running your own certificate authority is twofold. In the best case, you can just install your CA certificate in the browsers trusted CA store, or teach your OS how to trust new CAs. In the worst case, you're doing the exact same amount of work to ignore security warnings!
On Matters of Encryption
There is one downside to being a CA: the security concerns get real, and fast. With one-off self-signed certificates, a leaked private key would allow an attacker to impersonate that system. But if you lose control of the CA signing key, an attacker can issue new certificates for things like totes.mybank.com and you may not notice (yay green padlock!)
The key here is encryption. And yes, I did think about editing out that accidental pun. But I didn't. You're welcome.
Encryption, encryption, encryption.
What we need is a system that can keep our CA signing key secret, and only bring it out when we need to use it. Luckily, there's a freely available, rock-solid, open source solution that works on every major operating system I'd want to run on: Vault.
Vault provides a secure credentials storage system. Coupled with safe, an operator-friendly command-line tool I wrote, we have the makings of a super-easy-yet-secure setup.
Into The Vault Of Secrets
First, you're going to need a place to run the Vault. You can go totally secure and air-gap a laptop or old desktop workstation, if you want. Or, you can just spin the Vault process up when you need it and leave it offline otherwise. I prefer the latter, and I usually do it on a Linux box.
My daily workhorse is a maxed-out Macbook Pro, so why do I prefer Linux? Because it has a neat little system call named mlock(2).
From the man page:
lock part or all of the calling process's virtual address space
into RAM, preventing that memory from being paged to the swap
area.
This is important, because Vault is a long-running process, and it will be handling secrets directly. With mlock(2), we can rest assured that the memory management unit (a critical part of any modern OS) isn't going to barge in and copy sensitive memory to an unencrypted swap file somewhere.
(Note: Vault does have an option to turn off its mlock behaviors, but they don't recommend doing so and neither do I.)
So, Linux it is.
First, we need a place to store the encrypted data while the Vault is powered off.
$ mkdir -p ~/.cavault/data
$ sudo chown -R jrhunt:root ~/.cavault
You'll want to go download the Linux Vault Binary (which comes package inside of a zipfile). I recommend putting this inside the ~/.cavault root directory we just created.
$ curl -Lo ~/.cavault/vault.zip \\\\
    https://releases.hashicorp.com/vault/0.9.0/vault_0.9.0_linux_amd64.zip
$ (cd ~/bin && unzip vault.zip && rm vault.zip)
In order to run vault as a non-root user, while still maintaining the ability to mlock(2) the sensitive bits of memory, we can use setcap on the vault binary:
$ sudo setcap cap_ipc_lock=+ep ~/bin/vault
Configuring Vault is pretty straightforward. I'm not going to enable too much functionality — Vault can do a lot more than what we're going to use it for. Here's a good starting configuration:
$ cat >~/.cavault/conf <<EOF
listener "tcp" {
  address         = "127.0.0.1:8200"
  tls_cert_file   = "$HOME/.cavault/tls.pem"
  tls_key_file    = "$HOME/.cavault/tls.key"
  tls_min_version = "tls12"
}
storage "file" {
  path = "$HOME/.cavault/data"
}
EOF
With this configuration, Vault will listen for requests on https://127.0.0.1:8200, over TLS 1.2, and will store the encrypted, at-rest credential data in our ~/.cavault/data directory.
You may notice that I snuck another X.509 certificate and key in there. It's turtles, all the way down. For my specific setup, I reused a wildcard certificate that was valid for another domain. If you want (and if you're only running over loopback) you can specify tls_disable = 1 and run over HTTP until you can generate a certificate using safe+vault. So meta.
Next, let's write a small script to run the Vault, since remembering command-line arguments and paths is annoying.
$ cat ~/bin/ca <<EOF
#!/bin/sh
exec vault server -config ~/.cavault/conf
EOF
$ chmod 755 ~/bin/ca
All that's left to do now is to fire it up.
$ ca
==> Vault server configuration:

        Cgo: disabled
 Listener 1: tcp (addr: "127.0.0.1:8200", cluster address: "127.0.0.1:8201", tls: "enabled")
  Log Level: info
      Mlock: supported: true, enabled: true
    Storage: file
    Version: Vault v0.9.0
Version Sha: bdac1854478538052ba5b7ec9a9ec688d35a3335
When you start Vault up the first time, it will be in an uninitialized state. You won't be able to read secrets from it or put secrets into it. To initialize the Vault, let's use safe:
$ safe target ca https://127.0.0.1:8200
Now targeting ca at https://127.0.0.1:8200

$ safe vault status
Error checking seal status: Error making API request.

URL: GET https://127.0.0.1:8200/v1/sys/seal-status
Code: 400. Errors:

* server is not yet initialized
!! exit status 1

$ safe vault init
Unseal Key 1: wXTO7wdmF0TVfqivzw6OaJiVeC+QNacAanTsxQ1RlKad
Unseal Key 2: QQugZ0RmflcMzHTLQCt1StP3XXGiCMWOabhWkXvuDMUS
Unseal Key 3: 1jzeotmjwLahW7s8zhvJTs/npVgBVwjS5cAYgRjBJf9x
Unseal Key 4: cN+wF2qw3xliLwxzU6t+/DnYtBoW2FC1RYom/NEI4XNj
Unseal Key 5: E0Q/IRJr9RiWNW3kR6uvSSo1ehZ8AOO0+jvugQQgy1Q4
Initial Root Token: b2318812-b5f2-0966-3a1b-ea964bc1512d

Vault initialized with 5 keys and a key threshold of 3. Please
securely distribute the above keys. When the vault is re-sealed,
restarted, or stopped, you must provide at least 3 of these keys
to unseal it again.

Vault does not store the master key. Without at least 3 keys,
your vault will remain permanently sealed.
Your unseal keys and initial root token will be different.
Now the Vault is initialized, but it is still sealed. You'll need to run safe vault unseal three times (turning widdershins optional), supplying a different unseal key each time.
$ safe vault unseal
Key (will be hidden):

$ safe vault unseal
Key (will be hidden):

$ safe vault unseal
Key (will be hidden):
Finally, we can authenticate with our root token:
$ safe auth token
Authenticating against ca at https://127.0.0.1:8200
Token:
The Joys Of Using safe
The first thing I do on any Vault I administer is to set a "canary" value:
$ safe set secret/handshake knock=knock
knock: knock

$ safe tree
.
└── secret
    └── handshake
safe tree is just one of the handy little commands that safe provides. The one we'll be most interested in for this project is safe x509 — there's a whole subsystem for generating CAs, issuing certificates, managing CRLs, etc!
First things first, we need an actual certificate authority certificate, one that is capable of signing other certs.
$ safe x509 issue --ca \\\\
                  --name ca.jameshunt.us \\\\
                  --bits 4096 \\\\
                  --subject /cn=ca.jameshunt.us \\\\
                  --ttl 10y \\\\
                  secret/jameshunt.us/ca
The first flag, --ca tells safe we want a CA cert.
The --name flag sets a subjectAltName for the certificate, identifying who the CA is. What you choose is up to you, and what DNS domains you own, but using the node name ca is a good practice to get into.
The --bits flag is important — it sets the RSA private key strength, in bits. Valid values are 1024 (highly discouraged, if not outright broken), 2048 (okay for leaf certs) and 4096 (super-strong). I'll take the strongest my CPUs can handle, thank you very much!
The --subject flag identifies the CA by providing a full identity. Sometimes you will see this as something like
/cn=ca.foo/c=US/st=New York/c=Buffalo/o=Hunt Productions, Inc./ou=R&D
Which of these relative distinguished names you choose to specify is entirely up to you. Check out RFC 5280 for details.
The --ttl flag determines how long the CA certificate is good for. I'd like a decade or so before I have to rotate out my certs, but you are welcome to choose a shorter time-to-live.
The last argument to safe x509 issue is the path, inside the Vault, where safe should store all the bits and pieces of the CA, including its private key and the public PEM-encoded certificate.
If all goes well, your laptop will crank on the RSA key generation phase for a bit and then you'll be back at your command prompt.
$ safe tree
.
└── secret
    ├── handshake
    └── jameshunt.us/
        └── ca
You can use safe read to see what was generated:
$ safe read secret/jameshunt.us/ca
--- # secret/jameshunt.us/ca
certificate: |
  -----BEGIN CERTIFICATE-----
  MIIE4TCCAsmgAwIBAgIBAjANBgkqhkiG9w0BAQ0FADAaMRgwFgYDVQQDEw9jYS5q
  ....................... etc.  ..................................
  ge1b5Xm7GrekaL2VqW/hTLXxnSRk9RzfZl8M421ueRmVlRun8P7J8IkKynx22uNA
  Jt/9L4w=
  -----END CERTIFICATE-----
combined: |
  -----BEGIN CERTIFICATE-----
  MIIE4TCCAsmgAwIBAgIBAjANBgkqhkiG9w0BAQ0FADAaMRgwFgYDVQQDEw9jYS5q
  ....................... etc.  ..................................
  ge1b5Xm7GrekaL2VqW/hTLXxnSRk9RzfZl8M421ueRmVlRun8P7J8IkKynx22uNA
  Jt/9L4w=
  -----END CERTIFICATE-----
  -----BEGIN RSA PRIVATE KEY-----
  tB3AlPKOd0onIcb1pomGZoFaGJQer3Pj8+hlP6ysHF9csAjleMEPmRFFcuDxoOKQ
  ....................... etc.  ..................................
  aKjrjAFAl+waomosq6IQtZqFy2ys2z75Lpbas2nHiKQKpIH3CccYjQ==
  -----END RSA PRIVATE KEY-----
crl: |
  -----BEGIN X509 CRL-----
  MIICZDBOAgEBMA0GCSqGSIb3DQEBCwUAMBoxGDAWBgNVBAMTD2NhLmphbWVzaHVu
  ....................... etc.  ..................................
  fouAOTFAl+waomosq6IQtZqFy2ys2z75Lpbas2nHiKQKpIH3CccYjQ==
  -----END X509 CRL-----
key: |
  -----BEGIN RSA PRIVATE KEY-----
  tB3AlPKOd0onIcb1pomGZoFaGJQer3Pj8+hlP6ysHF9csAjleMEPmRFFcuDxoOKQ
  ....................... etc.  ..................................
  aKjrjAFAl+waomosq6IQtZqFy2ys2z75Lpbas2nHiKQKpIH3CccYjQ==
  -----END RSA PRIVATE KEY-----
serial: "4"
The following keys are stored:
- certificate - The PEM-encoded CA certificate. This is what you will need to import into your browser / OS.
- combined - The public certificate plus the private key. You won't need this.
- crl - A certificate revocation list, managed by
safe x509 revoke - key - The private CA signing key, PEM-encoded. You won't ever need to use this, and you definitely shouldn't export it to disk.
So let's pull that CA certificate out and put it on-disk:
$ safe read secret/jameshunt.us/ca:certificate > ca.pem
Easy. You can now import that certificate into your browser or your OS. That's too broad a topic to cover here, but here are some helpful links:
- macOS Sierra
- Windows 7 / MSIE
- Firefox
- Chrome (technically the article is talking about self-signed
- certificates, but the technique also applies tonew trusted root authorities)
Congratulations, you have a working certificate authority.
Issuing Some Certificates
safe x509 issue can also issue certificates as your CA, signing them with the CA signing key, securely:
$ safe x509 issue \\\\
    --signed-by secret/jameshunt.us/ca \\\\
    --name foo.jameshunt.us \\\\
    --name *.bar.jameshunt.us \\\\
    --name 10.6.7.8 \\\\
    --ttl 90d \\\\
    secret/jameshunt.us/a-new-cert
The chief difference here is that we specified --signed-by as the path to our CA in the Vault. That's all safe x509 needs to know in order to properly sign your new certificate.
Another new thing is that we specified --name multiple times. You can have as many subject alternative names as you need (within reason), and they can be regular names like foo.jameshunt.us, wildcards like *.bar.jameshunt.us, IP addresses like 10.6.7.8, and even email addresses (not shown).
If you want to know the particulars for a certificate in your CA vault, you can use safe x509 show:
$ safe x509 show secret/jameshunt.us/a-new-cert
secret/jameshunt.us/a-new-cert:
  cn=foo.jameshunt.us
  issued by: cn=ca.jameshunt.us

  expires in a 89 days
  valid from Nov 17 2017 - Feb 15 2018 (~90 days)
  for the following names:
    - foo.jameshunt.us (DNS)
    - *.bar.jameshunt.us (DNS)
    - 10.6.7.8 (IP)
As you can see, this certificate is only good for 90 days, has all the correct SANs, and was issued by our new CA.
If you need to configure nginx to use this cert, you can grab the combined secret:
$ safe read secret/jameshunt/us/a-new-cert:combined > nginx.pem
Otherwise, the key and certificate are available separately in the key and certificate attributes, respectively.
Next Steps
I strongly encourage you to take a look at safe help x509 and the help pages for each sub-command (safe help x509 issue and friends). safe has a great many other tricks up its sleeve, including the ability to generate new SSH and RSA keypairs, random password generation, crypt support and reformatting, and more.
When you're not using the Vault, you can shut it down and let the data reside safely and securely on-disk, encrypted. When you need it, fire it up, unseal it, and go to town.
Happy Hacking!
UPDATE (Nov 20, 2017) You should really put the vault binary in your $PATH so that safe can see it. I updated the instructions, code, and configuration accordingly.

James (@iamjameshunt) works on the Internet, spends his weekends developing new and interesting bits of software and his nights trying to make sense of research papers.
Currently exploring Kubernetes, as both a floor wax and a dessert topping.