Scanning Books
A while back, I stumbled across an intriguing DIY community: Book Scanners. They have lots of books. I have lots of books. They want to digitally archive their books. I …
I also want to digitally archive my books, even if I didn’t know it before a few months ago.
Fast-forward to last weekend, when I got my workshop all in order:

You can actually see my first attempt at a book scanning rig, over there on the left. It’s little more than a cardboard box, cut diagonally and opened up, with two cheap (~$60) digital cameras on even cheaper (~$15) mounting arms. Here’s a closer view:
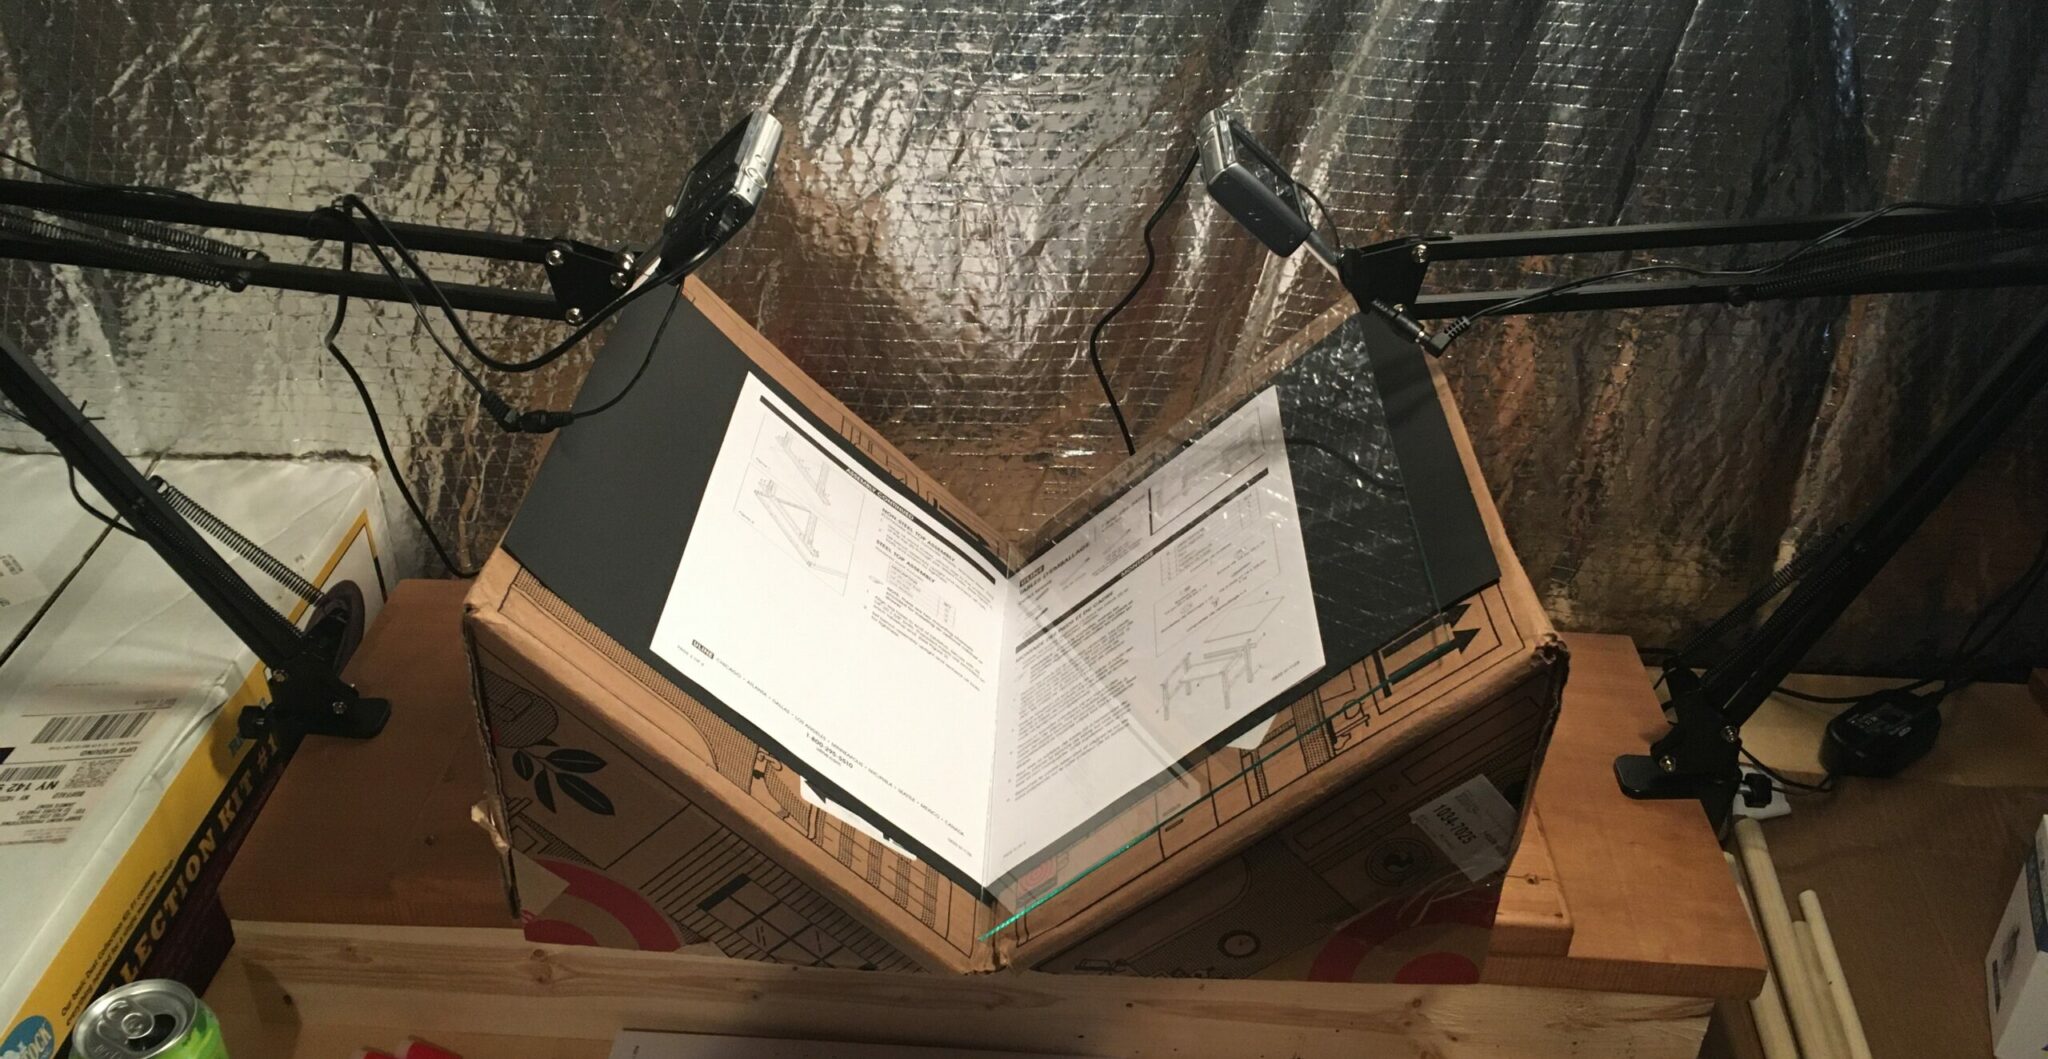
The concept is pretty straightforward: the book lays flat on the cardboard box, at (roughly) a 100° angle, and each camera is pointed at the opposite page. To help the book lay flat, we put two pieces of glass / lexan—I’m using the plates out of some 11×14″ picture frames I picked up on clearance at a craft hobby store—the cameras can see through the glass / lexan and if we angle the light juuuust right, there’s no glare.
While you can run the cameras on battery, and regularly re-charge them, I opted to go for the hard-wired approach, with two of these:

These AC adapters plug into the wall and provide a “blank” battery cartridge that delivers electrons on the same contacts as a real battery. The camera has no idea we’ve tricked into being on all the time!
For control, I’m using a combination of CHDK — the Canon Hack Development Kit, and a Raspberry Pi. If I’d had my druthers, I’d have used a Pi model with enough onboard USB ports (i.e. 2 or more), but all I had on hand was a Model A+ v1.1:
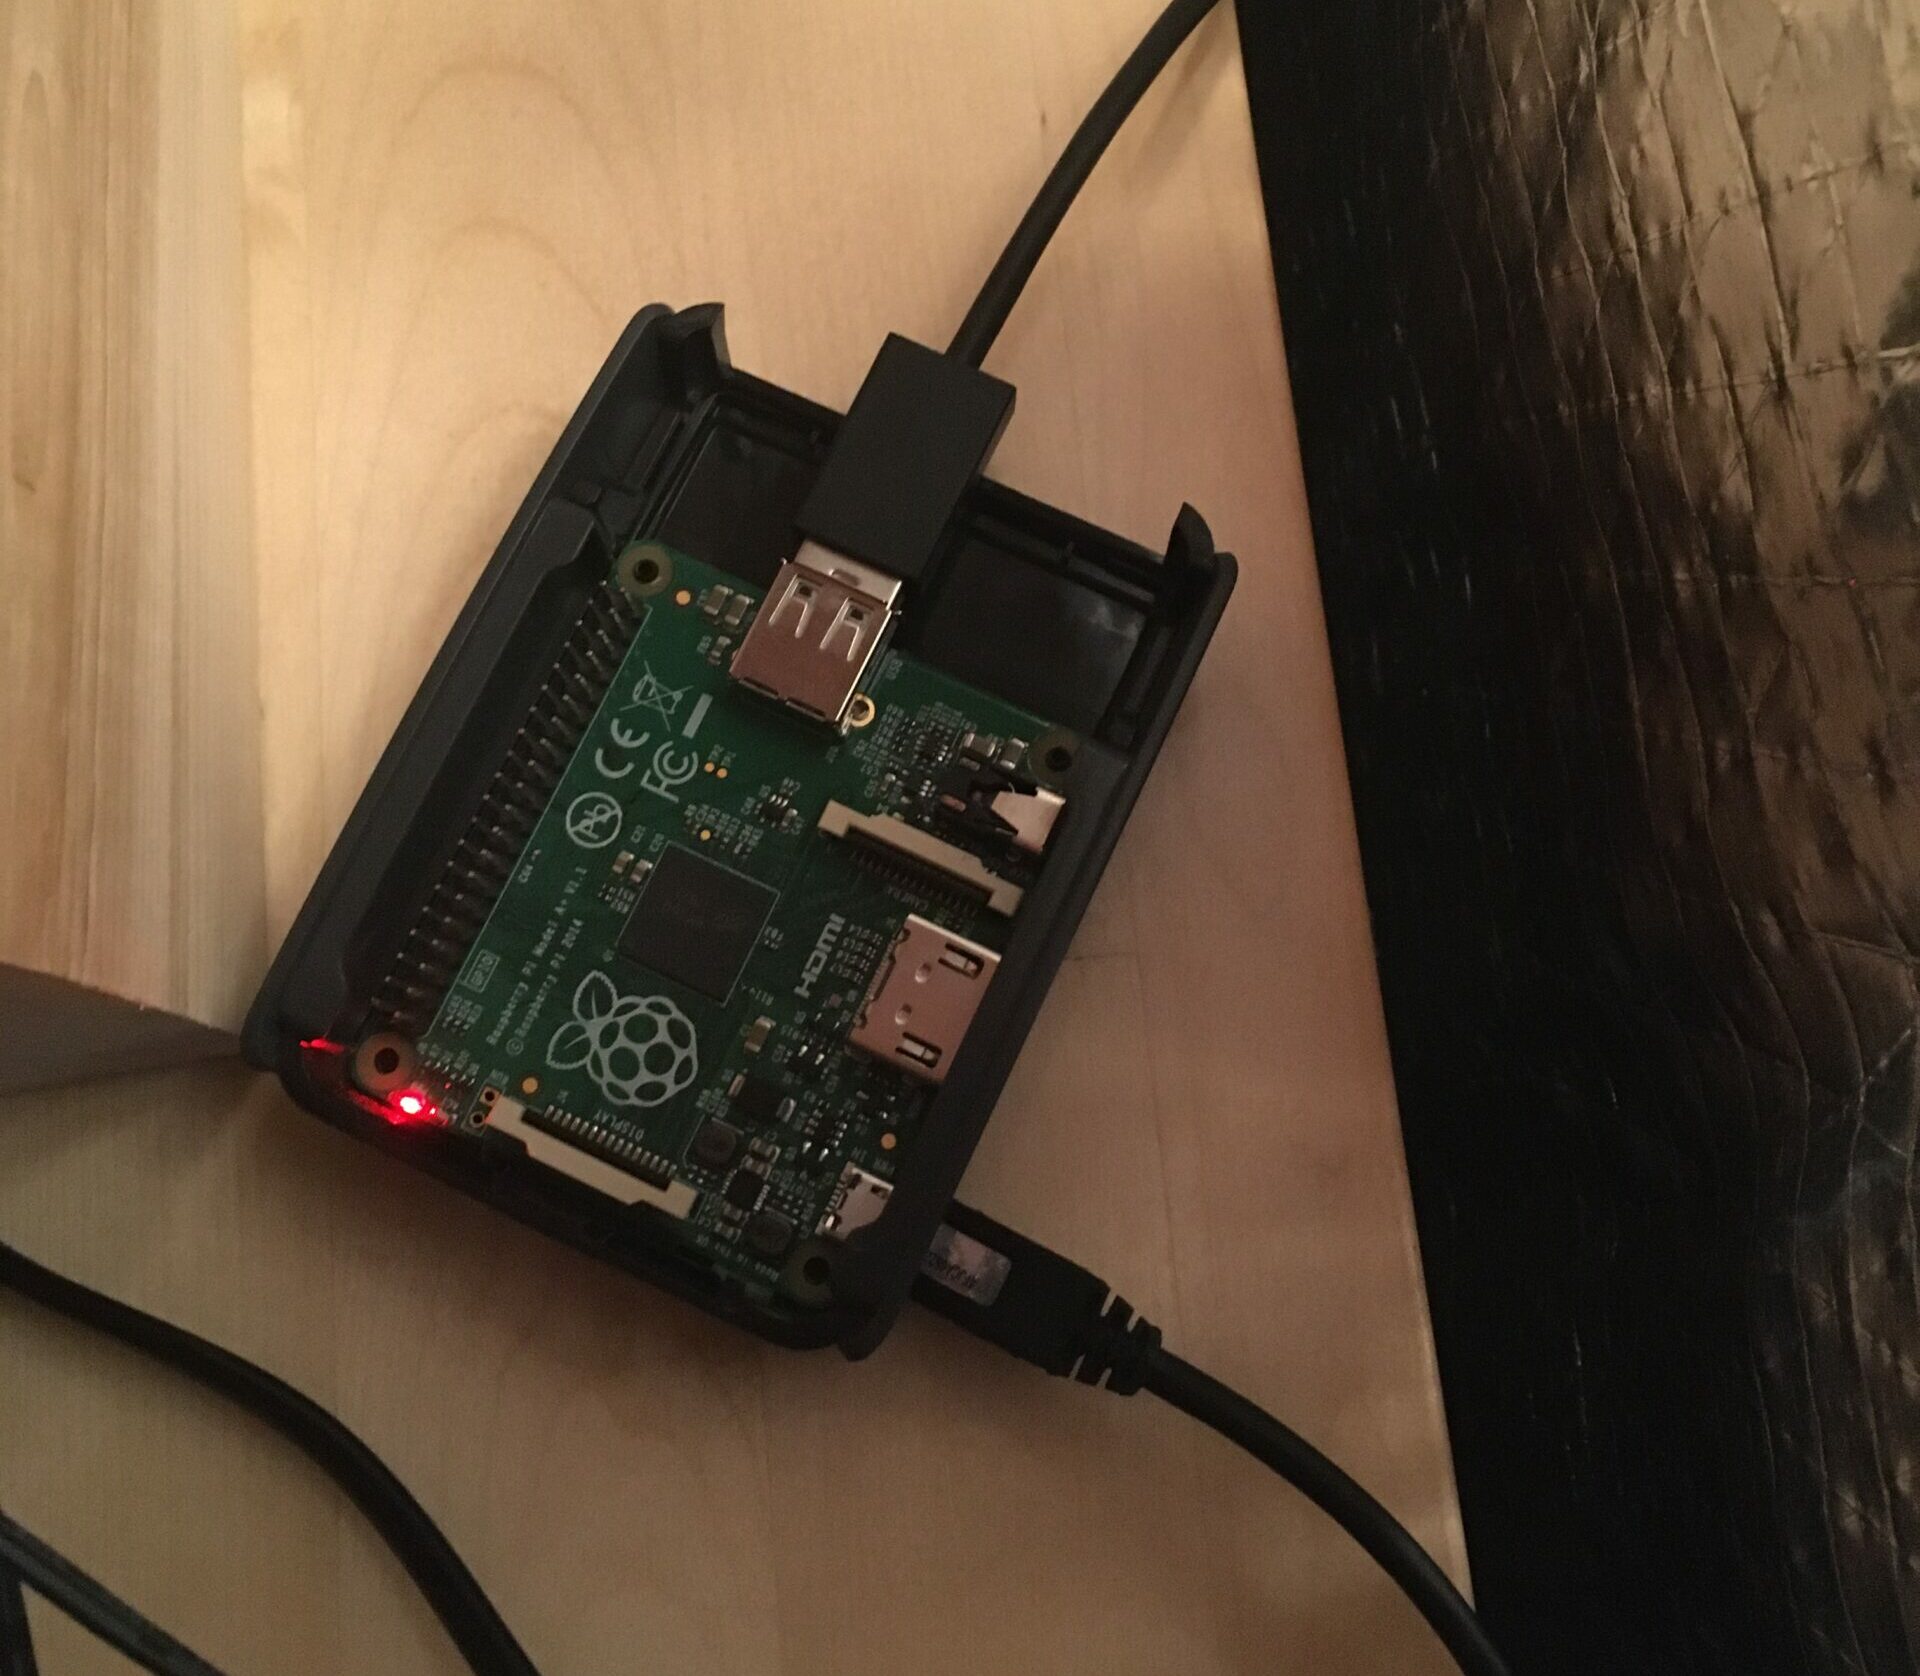
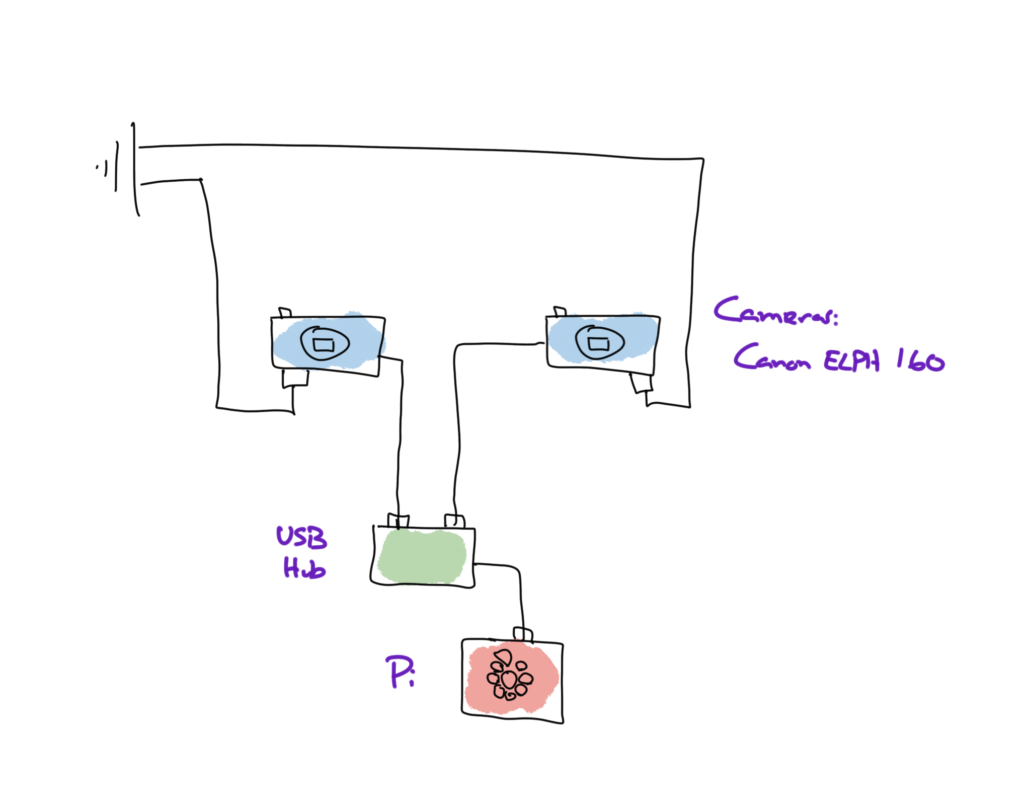
The Pi is hooked up to an external USB hub to get to port capacity. Here’s a rough block diagram:
The Software
With the hardware wired up and ready to go, it’s time to talk about the software bits that will make the whole thing scan. The trick with book scanning is to keep the “fiddling with the rig” to a minimum. For that, I’m using PTP – Picture Transfer Protocol, a means of remotely controlling a modern (-ish) digital camera over a USB link. The excellent (and aptly named!) software package chdkptp makes it easier to interact with PTP-enabled CHDK platforms.
For this to work, the cameras need to be running 1.2 of the CHDK firmware. CHDK is a fascinating project in its own right — you burn an image into an SD card, lock it, load it, and boot up the camera. The camera notices that the SD card is locked, and boots off of the card, instead of its onboard ROM. It’s kind of like jailbreaking an iPhone, without all the stress.
The version of CHDK that I’m loading has PTP support built right in, so it can immediately take commands over the connected USB bus. Yes, that’s a bit redundant (universal serial bus bus), but what was I supposed to call it? the US bus?
The chdkptp package, on the other hand, provides the client driver for the PTP conversation. With it, we can issue commands across the USB link (yeah, that works better) and make the cameras do our bidding. Here’s roughly how it works:
$ sudo ./chdkptp-r964/chdkptp.sh -r -elist
-1:Canon PowerShot ELPH 160 b=001 d=022 v=0x4a9 p=0x32aa s=...
-2:Canon PowerShot ELPH 160 b=001 d=021 v=0x4a9 p=0x32aa s=...
That, however, is way too much to type, and my fingers are itching to turn pages, not mash keys. Here’s a wrapper script:
$ cat ~/bin/ptp
#!/bin/sh
set -e
exec sudo $HOME/chdkptp-r964/chdkptp.sh -r -e"$@"

$ ptp list
-1:Canon PowerShot ELPH 160 b=001 d=022 v=0x4a9 p=0x32aa s=...
-2:Canon PowerShot ELPH 160 b=001 d=021 v=0x4a9 p=0x32aa s=...
Much better.
(By the way, those USB device numbers (d019, d020, etc.) will change every time the camera power cycles; as we build out the rest of the automation / control software, we’ll definitely need to keep that in mind)
PTP defines an operation called remote shoot, which will let us take a picture without physically touching the camera body. That’s key, because those stand arms aren’t the most rock solid things in the world.
$ cat shoot
#!/usr/bin/env ptpx
connect -b=001 -d=021
rs test-image
I should mention that the chdkptp binary is a bit awkward to use at times,
and I have written this ptpx wrapper to emulate the behavior of more
UNIX-y shell / command interpreters like Bourne Shell:
$ cat ~/bin/ptpx
#!/bin/sh
if [ "x$1" = "x" ]; then
  exec sudo $HOME/chdkptp-r964/chdkptp.sh -r -i
else
  exec sudo $HOME/chdkptp-r964/chdkptp.sh -r -e"source $1"
fi
return 7
Without arguments,ptpx starts up an interactive (-i) shell. With
arguments, it sources the first argument (ignoring the rest) in a sense
executing its argument. Just like a real shell!
Time to shoot some photos!
$ ./shoot
connected: Canon PowerShot ELPH 160, max packet size 512
ERROR: not in rec mode
ERROR: error on line 3
Most cameras operate in one of two modes: playback and record. In playback mode, you can browse through the photos stored on the camera, muck with settings, change the time, and more. In record mode, the backpanel LCD turns into a pixelated viewfinder, and the camera can actually produce output image files from what’s on the lens.
We want record mode:
$ cat shoot
#!/usr/bin/env ptpx
connect -b=001 -d=021
rec
rs test-image

$ ./shoot
connected: Canon PowerShot ELPH 160, max packet size 512
(flash goes off, camera chimes, and boom! photograph)

$ ls -lah test-image.jpg
-rw-r--r-- 1 root root 4.2M Apr 21 02:08 test-image.jpg
Now we have a working point-and-shoot, which we can access over SSH. Let’s double the fun!
$ cat capture
#!/bin/sh
set -eu

# USAGE: capture NUMBER CAM1 CAM2
n=$1 ; shift
for cam in "$@"; do
    cat <<EOF | ptpi &
connect -b=001 -d=$cam
rs img-$n-from-$cam
EOF
done

wait
This script is a bit more involved, but it builds on the same concepts. The
ppti script, however, is new:
#!/bin/sh
f=$ (mktemp ptpXXXXXXXXX)
trap "rm -f ${f}" QUIT TERM INT EXIT
cat >$f
ptpx $f
exit $?
It takes standard input (the “i” stands for “input”), stuffs it into a file
on disk, and then calls the ptpx script on it. At the end of the
execution, come hell or high water, the temporary file is removed. Back to
capture!
$ capture 1 21 22
connected: Canon PowerShot ELPH 160, max packet size 512
connected: Canon PowerShot ELPH 160, max packet size 512
Now if we look in the current working directory, we can plainly see our two images:
$ ls -lah
-rw-r--r-- 1 root root 4267460 Apr 21 02:11 img-1-from-21.jpg
-rw-r--r-- 1 root root 5745788 Apr 21 02:11 img-1-from-22.jpg
Eventually, we’ll want to run these through some computer vision code to find page boundaries, correct for skew and warp, re-order the pages, and pop out a PDF. I’m still working on all of that; so check back soon!

James works on the Internet, spends his weekends developing new and interesting bits of software and his nights trying to make sense of research papers.
Currently exploring just how much data you can shove though DuckDB before it explodes.